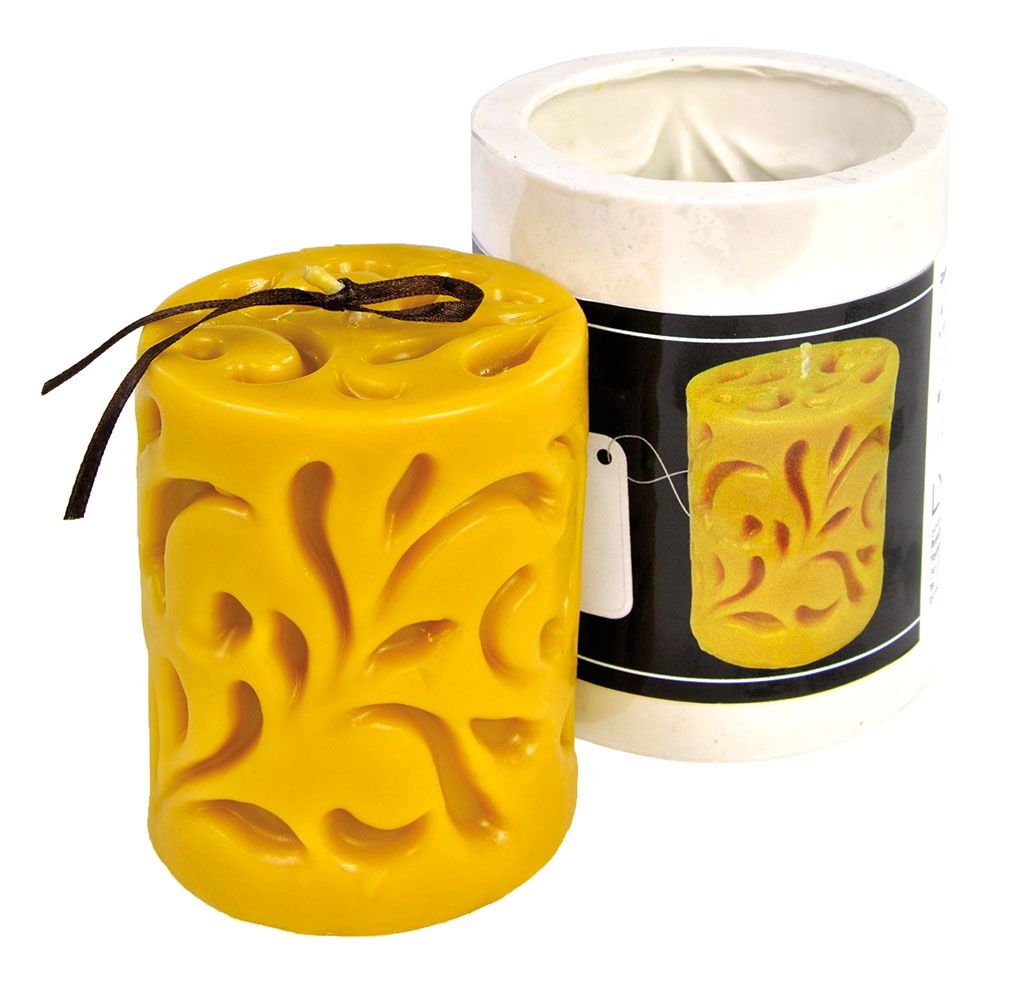
Silicone mould - Cylinder, casted
SILICONE MOULD - CAST CYLINDER - HEIGHT 9.5 CM
Height: 95 mm
Diameter: 75 mm
Recommended wick: 3
Wax weight: 335 g
Beeswax candles and shapes
Para-therapeutic and relaxing attributes of beeswax candles have been known for hundreds of years. They used to be used for liturgical rites and also for providing light to rich households.
They are featured by an attractive and original outlook; they burn smokeless whilst producing a soft, gentle scent of honey and propolis, they also work as negative ionisers. They eliminate electromagnetic radiation caused by electrical appliances and neutralize cigarette smoke.
Beeswax candles, and their process of burning in particular, soothes and calms you down, makes breathing easier, heals blocked sinuses and provides relief for running nose and asthma and even reduces high blood pressure. It is recommended to burn candles every day from 15 to 60 minutes.
Beeswax, the material the candles are made of, is obtained from old wax and edgings that are left out during the frame uncapping and other debris.
After melting and possible clarification and filtration, one can refine it by adding various essential or fragrance oils, although it is not necessary.
Making your own beeswax candle step-by-step:
You will need:
» a silicon mould,
» a wick ( with appropriate thickness i.e. the larger candle, the thicker wick)
» a rubber band
» a toothpick
» silicone (spray) - optional
You can spray the mould from inside with silicone to make it easier to take it out afterwards if the pattern is more complex.
1. Preparing the mould
If we intend to cast the candle with a complex pattern, it is recommended to spray it from inside with silicone – this will
make it easier to remove it once the whole process has been completed.Cut the wick of appropriate length (it has to be
longer than the mould itself) and thread it through the inside of the candle.The next step is to put the rubber bands onto
the mould followed by sticking the toothpick into the wick’s ending and stretching it properly.
2. Filling the mould with wax
It is recommended to melt the wax in the pot (enamelled). Prior to filling the mould, make sure that the wax has got an appropriate temperature – around 60 degrees Celsius is recommended.It must neither be too hot nor too cold. Pour the wax in gently, making sure it gets into all mould’s pockets. The time needed for the wax to set depends on the size of the mould.
3. Removing a candle from the mould
Once the wax has set and become cold, take the rubber bands off, open the mould and gently remove the candle followed by taking the toothpick off. Cut the wick off at the bottom and leave around 1 cm of wick on the top. The last part of ‘making the candle’ is to finish it off with a knife – cutting all sticking-out parts at the bottom and dipping the wick into the fluid wax.
Once done, candles may be decorated by using special wax markers; more advanced users can use ‘decoupage’ technique or natural products such as coffee beans.
Recomendations for easier use:
* For ease removal spray the mould with silicone spray
* Add candlewick before pouring liquid wax - make sure candlewick is slightly tight
* Before pouring liquid wax tighten the mould with a rope or rubber
* Use liquid wax preheated to 50°C.

